How To Tell If A Patch Is Iron-On

From Casual to Cool: 4 Hoodie Layering Ideas
September 24, 2026
Found a patch you want to add to your jacket, jeans, or backpack, but you are unsure how to attach it? Before reaching for an iron or needle, take a closer look at the backing. Learning how to tell if a patch is iron-on can save you time and protect your clothing from heat damage.
Some patches have a heat-activated adhesive, while others need stitching to stay securely in place.
At the end of the day, a few simple checks can help you identify the difference and decide how to apply your patch without damaging the fabric.0
A Close-Up Look at How To Tell If a Patch Is Iron-On
Before attaching a patch to your favorite jacket or hoodie, take a moment to examine its construction. After all, knowing whether a patch is iron-on helps you apply it correctly and avoid damaging the garment.
Here are three practical ways to identify the iron-on backing for patches and understand what it means.
1. Examine the Patch Backing Closely

The back of a patch usually provides the clearest clue about how it attaches to fabric. When figuring out how to know if a patch is iron-on, start by checking its surface under good lighting. An iron-on design commonly has an added adhesive layer that looks smoother or feels firmer than ordinary fabric backing.
Run your fingers gently across the reverse side. You may notice a slightly slick finish, a thin coating, or a surface that comes off as different from the embroidered front. Some adhesive backings also have a subtle sheen when tilted toward a light source. These features suggest that heat may activate the bonding material.
A sew-on patch generally has a textile backing, with woven fibers, embroidery threads, or stitching visible across the reverse. However, appearances can vary considerably depending on the manufacturer and patch construction. Certain iron-on designs have fabric-like surfaces, while some sew-on styles include additional stabilizing materials.
Before applying heat, check the garment care label because different fibers respond differently to high temperatures. Research explains that polyester can melt under excessive heat, while acetate is particularly heat-sensitive. This makes checking fabric compatibility an important step before choosing an iron-on application method.
Keep in mind that visual inspection provides a useful first indication rather than a guarantee. If the patch came with packaging, product details, or application instructions, compare those details with what you see. That extra information can help confirm whether the backing is intended for heat application or requires another attachment method.
2. Compare the Texture and Construction of the Edges

The patch edges can offer another useful clue when the backing is difficult to identify. For this reason, another way on how to tell if a patch is iron-on suggest examining the border finish and whether the material appears designed for stitching or heat application.
Many embroidered designs have a finished border that protects the threads from unraveling. An iron-on version may also include an adhesive layer underneath. However, edge construction alone cannot confirm the attachment method because manufacturers can produce similar-looking designs with different backing options.
This distinction matters when ordering custom patches for school uniforms, team apparel, workwear, or personalized jackets. Two patches featuring the same artwork can have different attachment requirements depending on their backing. A thick embroidered border does not automatically mean the patch needs sewing, just as a smooth edge does not guarantee that adhesive is present.
3. Check the Product Label or Ask the Manufacturer
Sometimes, the most dependable answer comes from the information supplied with the patch. Packaging, order confirmations, product listings, and care instructions may specify whether the design has heat-activated adhesive or requires stitching. If you are still asking how to know if a patch is iron-on, make sure to check these details to resolve uncertainty without risking damage to your clothing.
Look for terms such as iron-on backing, heat-activated adhesive, or sew-on backing. These descriptions explain how the manufacturer intends the patch to be attached. Be careful with wording such as adhesive patch, because some products use pressure-sensitive glue that sticks without heat.
If the packaging is missing, search for the patch using its product name or contact the seller. Provide a clear photograph of the front and back, along with any available order details. A manufacturer may be able to identify the backing even when its appearance is ambiguous.
Steps to Follow for Iron-On Patches for Leather Jackets, Hoodies, and More
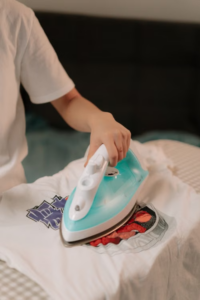
Once you have identified the backing, the next step is to check whether your garment can handle the application method. Fabric composition, surface texture, and patch construction all influence the result. Before getting ready to apply a patch, review these practical steps to help achieve a neat finish while protecting your clothing.
- Check the garment material: Cotton and denim generally tolerate iron-on applications better than delicate or heat-sensitive fabrics. Read the garment care label before choosing a temperature, especially when working with polyester blends or synthetic outerwear.
- Choose the appropriate attachment method: Traditional heat-activated adhesive works on compatible fabrics, but leather and suede can suffer permanent heat damage. Iron-on patches for leather jackets are therefore not suitable for direct application with a household iron. Consider a professional attachment or a method specifically approved for leather.
- Prepare the surface carefully: Make sure the garment is clean and completely dry, then lay it on a stable, heat-resistant surface. Smooth out wrinkles so the patch can sit evenly without folds beneath its edges.
- Position the patch before applying heat: Place the design where you want it and check the alignment from different angles. For letterman jackets, hoodies, and denim jackets, consider how seams, pockets, and folds might affect the final appearance.
- Follow the backing instructions: Use the temperature, pressure, and pressing time recommended by the patch manufacturer. A protective pressing cloth can help shield embroidered details and fabric from direct heat, while switching off steam is commonly recommended for heat-activated adhesive.
- Allow the patch to cool: Avoid pulling at the edges immediately after pressing. Once the material has cooled, check whether the patch is attached evenly and follow the manufacturer’s guidance if any area remains loose.
Find the Right Patch for Your Next Project
Knowing the answer to the question, ‘ how to tell if a patch is iron-on’ makes it easier to decorate clothing confidently and apply the patch correctly without damaging the material. Checking the backing, examining the construction, and confirming the manufacturer’s instructions can help you avoid mistakes before starting your project.
At Anything Chenille, we have been creating custom chenille patches since 2009, serving schools, organizations, and brands with a focus on quality, competitive pricing, and dependable customer service. Whether you are planning personalized team apparel, school lettering, or a distinctive jacket design, our team can help you explore options that suit your project.
Contact Anything Chenille to discuss your custom patch requirements and get started with a design that reflects your vision.